
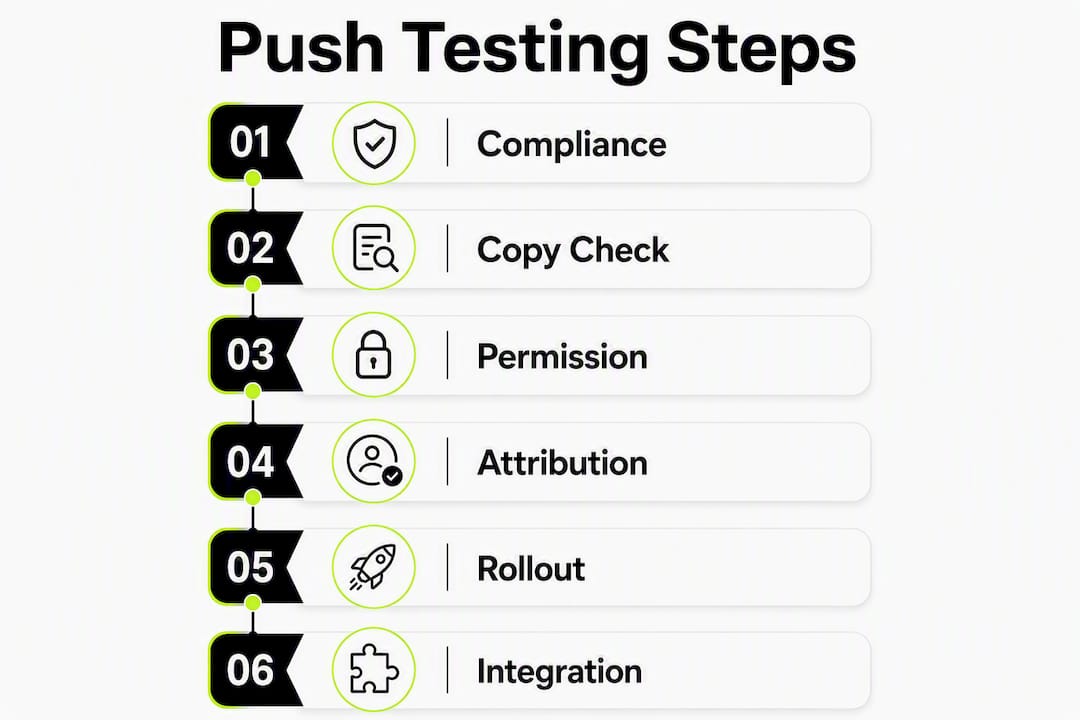
Before you schedule a single send, your push testing checklist needs to verify six things: Apple App Clip compliance, trigger integrity, copy clarity in the first 8 words, end-to-end cart persistence, permission and delivery behavior, and attribution accuracy. Storepush uses native iOS App Clips to reach shoppers on their lock screens without requiring an email or phone number, which means every one of these checks directly protects your recovered revenue.
Run these before any live send:
- App Clip compliance: Notifications must be task-focused and tied to an explicit user action inside the Clip, per Apple's App Clip guidelines.
- Trigger validation: Confirm cart-closed and product-viewed events fire correctly in your Shopify, WooCommerce, or BigCommerce integration.
- First-8-words test: Read your push copy's opening eight words in isolation. If they don't convey the offer, rewrite before sending.
- Cart persistence: Tap the push on a real device and confirm the cart pre-loads in the App Clip session.
- Permission/delivery check: Verify the 8-hour notification window is active and the opt-in prompt appears at the right moment.
- Attribution sanity check: Match at least five Storepush recovered orders against your store's order IDs before calling results valid.
The ecommerce opt-in benchmark is around 68% for push programs. If your rate is well below 68%, your permission prompt timing or copy needs work before you scale.
Table of Contents
- What does a preflight push testing checklist cover?
- Apple App Clip compliance and campaign setup checks
- How should you set up audience segments and trigger logic?
- Push copy and creative: does your message pass the first-8-words test?
- Does your end-to-end technical flow actually hold together?
- Permission behavior, send timing, and fatigue management
- How do you measure and attribute recovered revenue accurately?
- How do you design an A/B test that gives you real answers?
- Staged rollout, monitoring, and rollback criteria
- How do you analyze results and plan the next test?
- Storepush dashboard and integration checks
- Key Takeaways
- Why the checklist matters more than the campaign brief
- Storepush handles the hard parts of this checklist for you
- Useful sources
What does a preflight push testing checklist cover?
You can run the core preflight in 10–30 minutes. The goal is a go/no-go decision before the campaign touches real shoppers.
- Invoke the App Clip via your primary trigger method (Smart App Banner, QR, NFC, or direct link) and confirm the Clip loads correctly. Each invocation method behaves differently, so test the one your campaign actually uses.
- Trigger the notification permission window and confirm it appears after the user completes the Clip task, not before.
- Add a test product to cart, abandon it, and verify the push arrives within your configured delay window.
- Tap the push on a locked device and confirm the App Clip opens with the cart pre-loaded and Apple Pay available for one-tap checkout.
- Read your push title's first eight words aloud. They must name the product and the incentive.
Pro Tip: Use one staging store and a personal device to run the entire flow end-to-end before touching your production audience. Five minutes of hands-on testing catches more issues than an hour of log review.
Apple App Clip compliance and campaign setup checks
Apple enforces App Clip rules at review. Notifications sent outside an explicit user action risk rejection and user churn, so this section is non-negotiable.
Compliance audit checklist:
- Clip is task-focused with a single, clear objective (cart recovery or browse re-engagement).
- Push notifications are sent only in response to a user action inside the Clip, never as standalone promotional blasts.
- Default notification window is 8 hours from first use; if your campaign spans multiple days, you have requested explicit extended authorization for the additional week.
- App Clip binary stays under the 15 MB size ceiling and invocation URLs are correctly configured in App Store Connect.
- Card metadata (image, title, subtitle shown at invocation) is accurate and conversion-optimized.
| Check | Requirement | Pass Condition |
|---|---|---|
| Task focus | One primary task per Clip | Clip opens directly to cart or product |
| Notification trigger | Explicit user action only | No promotional pushes without user initiation |
| Notification window | 8-hour default; 1-week extended | Correct window active for campaign type |
| Clip size | Under 15 MB | Build confirmed in App Store Connect |
| Invocation URL | Correct per trigger method | URL resolves and loads correct Clip |
Pro Tip: Keep a copy of your App Store Connect metadata alongside your campaign brief. Mismatched card titles are one of the most common reasons App Clip experiences underperforming at the invocation stage.
How should you set up audience segments and trigger logic?
Precise targeting is what separates a 2% recovery rate from a meaningful one. Sloppy trigger logic means you're either missing shoppers or annoying recent buyers.
- Define your test audience: cart abandoners, browse abandoners, or high-value SKU watchers.
- Set exclusion rules: exclude shoppers who purchased in the last 24 hours, who have an open refund, or who already received a push in the current session.
- Create a randomized holdout group (typically 10–20% of eligible traffic) to measure causal lift against a control.
- Validate each trigger event in your integration: "cart closed without purchase" and "product viewed for more than X seconds" should fire in your Storepush event pipeline before you go live.
- Simulate a cart abandonment on your Shopify, WooCommerce, or BigCommerce staging store and confirm the event appears in Storepush's event log within the expected window.
- Check that browse-abandonment triggers use dwell time, not just page view, to avoid firing on accidental visits.
- Confirm webhook delivery status in your platform's developer logs.
Push copy and creative: does your message pass the first-8-words test?
AI summarizers preserve the first 5–8 words of a push notification, and many iOS lock screens truncate beyond that. Your copy must front-load the value.
First-8-words test checklist:
- Words 1–8 name the product and the offer. "Your Air Max 90s — 15% off, expires tonight" passes. "We noticed you left something behind" fails.
- Include the specific discount amount or price, not vague language like "great deal."
- CTA is a single verb: "Grab it," "Complete your order," "Claim your discount."
- Rich media (product image or countdown timer) is sized correctly and renders on both older and current iPhone models.
- Localized variants exist for any non-English audience segments you're targeting.
Pro Tip: Paste your push title into a plain text editor and read only the first eight words. If a stranger wouldn't know what you're selling or why they should tap, rewrite it. This is the fastest creative quality check you can run. See the push notification character limits guide for exact counts by platform.
Accessibility matters too. Use high-contrast images, never rely on color alone to signal urgency, and write alt text for any rich media asset.
Does your end-to-end technical flow actually hold together?
A push that delivers but drops the cart on the way to checkout is a conversion killer. Test the full journey before scaling.
- Tap the push on a locked device and time how long the App Clip takes to open.
- Confirm the cart pre-loads with the correct items, quantities, and prices.
- Complete a test purchase using Apple Pay and verify the order appears in both Storepush's dashboard and your store's order management system.
- Simulate a network interruption mid-session and confirm the fallback behavior (graceful error message, not a blank screen).
- Test an expired App Clip session: confirm the shopper is redirected to the full storefront rather than a dead end.
- Verify shared state transfer via deferred deep link, shared App Group, or session token so attribution carries through to the full app.
- Confirm push-to-App Clip journey stitching opens directly to the cart modal, not the app home screen.
- Check Storepush webhook event wiring for order creation confirmation.
- Document any failure modes in a short log with steps to reproduce.
Permission behavior, send timing, and fatigue management
Deliverability problems are quiet. You won't see them in your dashboard unless you look for them.
- Confirm the notification permission prompt appears after the user completes the Clip task, not at launch. Contextual timing drives higher opt-in rates.
- Test the 8-hour notification window on a real device: send a push at hour 7 and confirm delivery; send at hour 9 without extended authorization and confirm it does not deliver.
- Run a small-sample send across at least two iOS versions and two device models to surface any delivery differences.
- Check Storepush's rate controls and confirm your campaign won't exceed per-device throttle limits.
- For multi-push cadences, the recommended timing pattern is roughly 1 hour after abandonment, 24 hours with a small incentive, and 72 hours with a stronger offer.
Pro Tip: If your opt-in rate is tracking well below the 68% ecommerce benchmark, the most common fix is moving the permission prompt to after the user adds an item to cart inside the Clip, not at Clip launch.
How do you measure and attribute recovered revenue accurately?
Attribution errors compound fast. A single misconfigured window can make a mediocre campaign look like a winner.

| Metric | Definition | Benchmark / Target |
|---|---|---|
| Recovered order revenue | Orders attributed to push within your window | Primary KPI; compare to baseline |
| Conversion rate | Push taps that result in a completed order | Track against pre-campaign baseline |
| CTR | Push deliveries that result in a tap | Monitor for creative fatigue |
| Opt-in rate | Users who accept notification permission | ~68% for ecommerce |
| App Clip notification window | Default session duration | 8 hours (extendable to 1 week) |
Reconciliation checklist:
- Export Storepush's recovered-order list for the test window.
- Match each order ID against your Shopify, WooCommerce, or BigCommerce order records.
- Confirm the attribution window (8-hour, 24-hour, or 7-day) is consistent across Storepush and your store analytics.
- Flag any orders that appear in Storepush but not in your store system, and investigate before reporting results.
How do you design an A/B test that gives you real answers?
A vague hypothesis produces vague results. Start with a specific, falsifiable claim.
- Write the hypothesis: "Front-loading the discount amount in the first 8 words will increase recovered order revenue by at least 10% versus the control copy."
- Estimate your minimum sample size based on your baseline conversion rate. For most Storepush merchants, a meaningful test needs at least several hundred push deliveries per variant before drawing conclusions.
- Set a minimum test duration of 7 days to account for day-of-week variation, and longer during peak seasons.
- Define stopping rules upfront: stop early for a clear win (primary KPI exceeds threshold), stop for futility (no movement after full sample), and stop immediately if opt-out rate spikes.
- Test one variable at a time: copy, timing, or creative, never all three simultaneously.
- Use consistent naming conventions for variants (e.g.,
cart-recovery-v1-discount-firstvs.cart-recovery-v2-product-first). - Isolate test cohorts so the same shopper doesn't receive both variants.
- Log the hypothesis, sample size, and stopping rules before the test starts, not after.
Staged rollout, monitoring, and rollback criteria
Never go from zero to full audience in one step.
- Stage 1: Internal team cohort (5–10 people) to confirm end-to-end flow.
- Stage 2: 1% of live eligible audience for 24 hours; review delivery rate, opt-in rate, and checkout completion.
- Stage 3: 10% of audience for 48 hours; check for checkout failure spikes or unusual refund rates.
- Stage 4: Full rollout with active monitoring for the first 72 hours.
Define rollback triggers before you start: a checkout failure rate above your baseline, an opt-out rate spike, or an unexpected refund rate should pause the campaign automatically or trigger a manual review. Keep an incident log with timestamps and the name of the person who made each rollback decision.
Pro Tip: Set a calendar reminder for 48 hours after each stage increase. The most common mistake is moving to the next stage without reviewing the data from the previous one.
How do you analyze results and plan the next test?
Post-test analysis is where most teams leave money on the table.
- Run a statistical significance check on your primary KPI before declaring a winner. Practical significance matters too: a 2% lift that required two weeks of engineering time may not be worth repeating.
- Reconcile Storepush order data against your store's records one final time for the full test window.
- Document every unexpected behavior: failed deep links, permission prompt edge cases, copy that underperformed despite passing the first-8-words test.
- Write a one-page test report: hypothesis, result, sample size, and the single most important learning.
- List the next three experiments in priority order (e.g., adjust trigger threshold, fix deep-link bug, test a new creative format).
- File any technical failures as bugs with reproduction steps before closing the test.
Storepush dashboard and integration checks
Every checklist item above maps to a concrete action inside Storepush.
- Integration status: Confirm Shopify, WooCommerce, or BigCommerce webhook sync is active and events are flowing in the Storepush event log.
- Opt-in rate: Check the opt-in dashboard to confirm your rate is tracking near the 68% ecommerce benchmark.
- Recovered-order list: Review the attribution panel for the test window and spot-check five orders against your store's order IDs.
- CTR heatmaps: Use Storepush's CTR heatmap view to identify which copy variants and send times are driving taps.
- Event-to-order attribution: Confirm the attribution window setting matches your test design.
Pro Tip: Run a staging send inside Storepush before every new campaign. The platform's per-device event logs let you trace the full journey from trigger fire to order creation without touching production data.
For cart recovery without email or phone number collection, Storepush's App Clip model means your checklist is the only gate between a misconfigured campaign and a wasted send window.
Key Takeaways
A complete App Clip push testing checklist covers compliance, trigger logic, copy clarity, technical flow, deliverability, and attribution before any live send reaches shoppers' lock screens.
| Point | Details |
|---|---|
| App Clip compliance first | Every push must be task-focused and triggered by an explicit user action inside the Clip, per Apple guidelines. |
| First-8-words test | Read the opening eight words in isolation; they must name the product and the offer or the copy fails. |
| Staged rollout protects revenue | Move from internal cohort to 1%, then 10%, then full audience with defined rollback triggers at each stage. |
| Reconcile attribution before reporting | Match Storepush recovered orders to store order IDs for the test window before declaring results valid. |
| Storepush maps to every check | Use Storepush's event logs, CTR heatmaps, opt-in dashboard, and attribution panel to verify each checklist item in-platform. |
Why the checklist matters more than the campaign brief
Most push campaigns fail at the edges: a permission prompt that fires too early, a deep link that drops the cart, or a copy title that buries the offer behind a greeting. The checklist in this article isn't a formality. It's the difference between a campaign that recovers real revenue and one that burns your notification window on a misconfigured trigger.
What I find underappreciated is the deferral logic at the heart of App Clips. App Clips are designed as a conversion-first slice, where the purchase happens before account creation or a full app install. That reordering of the visitor journey is the strategic core of what Storepush does. Testing must validate that value comes before commitment, and that the conversion is portable to the full app afterward. Most marketers test the push copy and call it done. The teams that consistently recover revenue test the entire chain: trigger, Clip load, cart state, checkout handoff, and attribution reconciliation.
The first-8-words rule is the fastest single improvement most merchants can make today. Read your current push titles in isolation. If they don't pass, fix them before anything else.
Storepush handles the hard parts of this checklist for you
Storepush is built specifically for the scenario this checklist describes: recovering cart and browse abandoners via App Clip push notifications, without requiring an email address or phone number. The platform handles event wiring for Shopify, WooCommerce, BigCommerce, and custom storefronts, so your trigger validation steps are built into the integration setup. Staged sends, opt-in tracking, CTR heatmaps, and revenue attribution are all visible in one dashboard, which means the reconciliation and monitoring steps in this checklist become a matter of minutes rather than a manual export exercise.
For merchants ready to run their first App Clip push campaign or pressure-test an existing one, the practical next step is to book a demo at storepush.io or start a trial and run a staged send against a small live cohort using the preflight steps above.
Useful sources
- Design great App Clips (WWDC20) — Primary Apple developer resource for App Clip notification rules, permission windows, and task-focus requirements. Use for compliance and deliverability sections.